Yes, we can paint a stainless steel refrigerator. Stainless steel provides a smooth surface that can be successfully painted with the right preparation. We recommend cleaning the surface thoroughly, sanding it lightly to create texture for better paint adhesion, and then applying a primer specifically formulated for metal. Once the primer is dry, you can paint the refrigerator using a high-quality paint designed for metal surfaces. Please note that proper ventilation, patience, and careful application are essential for a professional-looking result.
Tips and Techniques for Painting a Stainless Steel Refrigerator
The first thing to consider when painting a stainless steel refrigerator is the type of paint you will use. It is important to choose a paint that is specifically designed for metal surfaces, as it will adhere better and provide a longer-lasting finish. Before you begin painting, make sure to clean the surface of the refrigerator thoroughly. Remove any grease, dirt, or residue using a mild detergent and a soft cloth. After cleaning, sand the surface of the refrigerator lightly to create a rough texture for the paint to adhere to. Once the surface is prepared, you can start painting. Use long, even strokes to apply the paint, making sure to cover the entire surface. It may be necessary to apply multiple coats for full coverage. Finally, allow the paint to dry completely before using or touching the refrigerator. By following these tips, you can transform your stainless steel refrigerator into a unique and personalized piece that matches your style.
Types of Paints and Finishes that work well on Stainless Steel
While stainless steel is known for its durability, it can still benefit from a fresh coat of paint or finish to enhance its appearance and protect it from damage. When choosing a paint or finish for stainless steel, there are a few factors to consider. First, make sure the product is specifically designed for use on metal surfaces. This will ensure proper adhesion and long-lasting results. Secondly, consider the finish you want to achieve. Do you prefer a glossy or matte look? There are different options available, such as high-gloss, satin, or textured finishes. Lastly, take into account the intended use of the stainless steel surface. If it's an area that will experience heavy use or exposure to moisture, opt for a durable paint or finish that offers resistance to stains, corrosion, and scratches. Consulting with a professional or doing some research can help you find the best product for your specific needs.
Step-by-Step Guide to Painting a Stainless Steel Refrigerator
The first step in painting a stainless steel refrigerator is to gather all the necessary materials. You will need a high-quality primer specifically designed for metal surfaces, as well as a durable paint that is suitable for stainless steel. Make sure to also have sandpaper or a sanding block, a clean cloth or sponge, painter's tape, and a paintbrush or roller. Before you begin painting, thoroughly clean the surface of your refrigerator to remove any dirt, grease, or residue. Next, lightly sand the stainless steel to create a rough surface that the primer and paint can adhere to. Once the surface is prepped, apply a thin and even coat of primer, being sure to cover the entire surface. Allow the primer to dry completely before applying the paint. When applying the paint, use long, smooth strokes and ensure even coverage. If necessary, apply a second coat once the first coat has dried. Finally, allow the paint to dry fully before placing any items or magnets on the refrigerator. By following these steps, you can transform the look of your stainless steel refrigerator to match your personal style and decor. For more tips on maintaining a comfortable and efficient home, read about why windows fog up in your house.
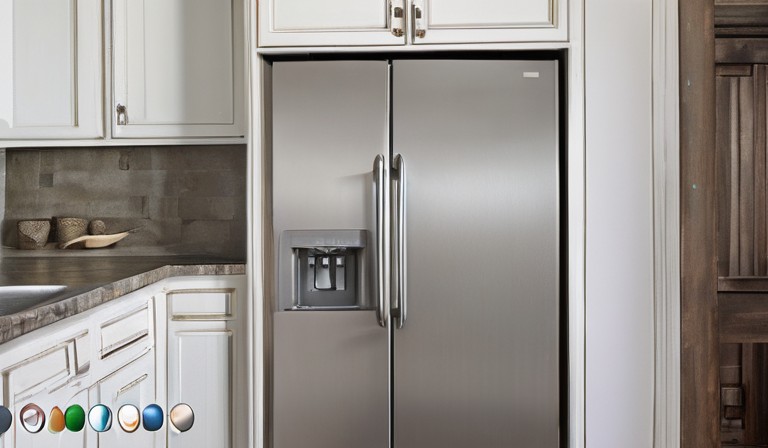
Preparing the Surface for Painting
First, we need to make sure the surface is clean and ready for painting. Start by removing any loose paint or debris using a scraper or wire brush. Next, wash the surface with a mild detergent and water solution to remove any dirt or grease. Rinse it thoroughly and allow it to dry completely before proceeding. If there are any cracks or holes, fill them with a suitable filler and sand them down until smooth. Finally, make sure to tape off any areas that you don't want to be painted, such as windows or trim. By preparing the surface properly, you'll ensure a smooth and long-lasting paint finish.
Best Practices for Brushing or Spraying the Paint
You want to make sure that you are using the best techniques when it comes to brushing or spraying paint. First, assess the surface you are working on. Is it smooth or textured? This will determine which method is most suitable. For smooth surfaces, using a paintbrush will provide a more even finish. Use long, smooth strokes and be sure to apply an even amount of pressure. If you are working on a textured surface, spraying may be the better option. Make sure you have proper ventilation and cover any nearby objects to avoid overspray. When spraying, hold the can or gun at a consistent distance and keep your movements steady and even. Whether you are brushing or spraying, always follow the manufacturer's instructions for the best results. For more information on paint-related procedures, read about returning paint at Walmart.
How to Achieve a Smooth and even Coat of Paint
When painting a room or object, achieving a smooth and even coat of paint is essential for a professional-looking finish. Before you begin, it's important to prepare the surface properly. This may involve sanding down any rough areas, filling in any holes or cracks, and cleaning the surface to remove dust and debris. Once the surface is prepared, it's time to choose the right tools and materials. High-quality brushes and rollers will help you achieve a smoother finish. Additionally, using a primer before applying the actual paint can help provide an even base and improve adhesion. While applying the paint, use long, even strokes or a rolling motion to ensure an even coat. Take your time and apply thin coats, allowing each one to dry before applying the next. This will reduce the chances of streaks or uneven patches. And finally, always remember to clean your brushes and rollers properly after use, as this will help maintain their quality for future projects.
Drying and Curing Time for Paint on Stainless Steel
It is important to understand the drying and curing time for paint on stainless steel to ensure a successful painting project. When you apply paint to stainless steel, it goes through a process of drying and curing. Drying refers to the time it takes for the paint to become tack-free, while curing refers to the time it takes for the paint to fully harden and develop its maximum durability. The drying time can vary depending on factors such as the type of paint used, temperature, and humidity. Generally, it takes around 1-2 hours for the paint to dry to touch and 24-48 hours for it to fully cure. It is crucial to let the paint cure properly to achieve a long-lasting and beautiful finish. Rushing the process could lead to peeling, cracking, or other issues. Therefore, it is important to be patient and allow the paint to fully cure before subjecting it to any heavy use or cleaning. By following these guidelines, you can ensure that your paint on stainless steel will look great and stand the test of time.
Maintenance and Cleaning Tips for Painted Stainless Steel
While we all love the sleek and modern look of painted stainless steel, it's important to keep it looking its best with regular maintenance and cleaning. To begin, you should always check with the manufacturer for any specific cleaning instructions for your particular product. Generally, you can keep your painted stainless steel looking great by regularly wiping it down with a mild soap and water solution. Avoid using abrasive cleaners or scrubbing pads, as they can scratch the surface. For stubborn stains, you can try using a non-abrasive cleaner specifically designed for stainless steel. Remember to always dry your painted stainless steel thoroughly to prevent water spots. By following these simple maintenance and cleaning tips, you can ensure that your painted stainless steel remains a beautiful and durable addition to your home or office.
Pros and Cons of Painting a Stainless Steel Refrigerator
The decision to paint a stainless steel refrigerator is a personal one that depends on your individual style and preferences. While painting can transform the appearance of your refrigerator, it's important to consider the pros and cons before diving in. On the one hand, painting a stainless steel refrigerator allows you to customize its look to match your kitchen decor or personal taste. It can be a budget-friendly option compared to purchasing a new refrigerator. However, there are some potential downsides to consider. First, painting may void the warranty on your refrigerator, so it's important to check the manufacturer's guidelines before proceeding. Additionally, the paint may not adhere properly to the stainless steel surface, leading to peeling or chipping over time. It's crucial to properly prepare the surface and use a high-quality paint and primer specifically designed for appliances. Finally, keep in mind that the painted surface may require more maintenance, as it can be prone to scratching and fingerprint smudges. By weighing these pros and cons, you can make an informed decision about painting your stainless steel refrigerator.
Where to Find Inspiration and Ideas for Paint Colors and Designs
By exploring different sources of inspiration, you can easily find ideas for paint colors and designs that will suit your personal taste and style. One great place to start is by browsing home decor magazines or websites that feature interior design ideas. These sources often showcase beautifully designed spaces and can provide you with a wealth of inspiration. Additionally, visiting local furniture stores or attending home decor expos can give you the opportunity to see different color palettes and design concepts in person. Don't forget to also take a look at this interesting article, where you can find a plethora of images and ideas that can be easily saved and referenced later. Remember, finding inspiration is a collaborative process between you and the world of design, so take the time to explore and discover what resonates with your unique vision and style.
Table of Achieving a polished look: Transforming a stainless steel refrigerator with paint
| Question | Answer |
|---|---|
| Can you paint a stainless steel refrigerator? | Yes |