No, we do not recommend sanding after painting. Sanding is typically done before painting as a way to smooth the surface and create better adherence for the paint. If you sand after painting, it can potentially damage the finish and affect the overall appearance of the painted surface. It's best to follow the recommended steps for preparation and painting to achieve the desired results.
How long to wait before sanding after painting?
In order to achieve a smooth and flawless finish on your painted surfaces, it's essential to know how long to wait before sanding. Generally, you should allow the paint to dry completely before attempting any sanding. The drying time can vary depending on several factors, such as the type of paint used, humidity levels, and the thickness of the applied coat. As a general rule of thumb, you should wait at least 24 hours before lightly sanding the painted surface. This ensures that the paint has had enough time to cure and harden, allowing for a better sanding experience. Always refer to the manufacturer's instructions for the specific drying time of the paint you are using. Additionally, remember to protect yourself by wearing appropriate safety gear, such as a mask and goggles, during the sanding process. For further reading, consider the article on why your dog might be walking in circles around the house.
Sanding techniques for a smooth finish after painting.
By sanding your painted surfaces, you can achieve a smooth and professional finish. Before you start, make sure the paint is completely dry. Begin by lightly sanding the surface with a fine-grit sandpaper, using a circular or back-and-forth motion. This will help remove any imperfections or bumps on the surface. Be careful not to sand too aggressively, as you don't want to damage the paint. After sanding, wipe away any dust or debris with a damp cloth. Once the surface is clean and dry, you can apply a second coat of paint if necessary. Remember, taking your time and using the right sanding techniques will ensure a flawless finish on your painted surfaces.
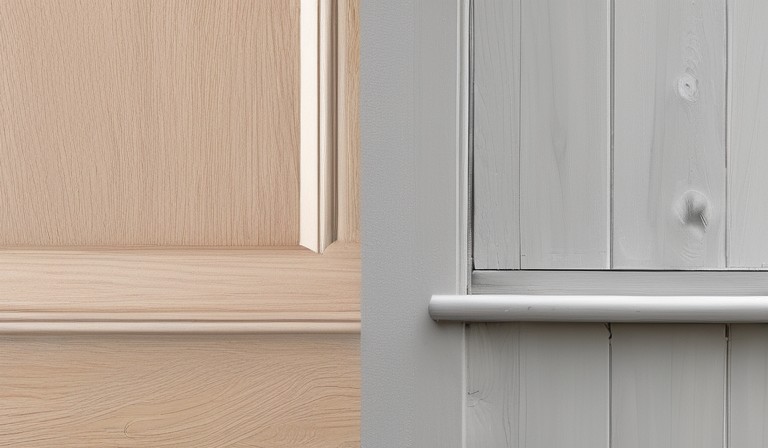
Sanding and preparing walls for repainting.
If you're planning to repaint your walls, it's important to properly prepare them beforehand. This will help ensure a smooth and long-lasting finish. The first step is to remove any loose or peeling paint with a scraper or sandpaper. Next, you'll want to fill in any cracks or holes with spackle and allow it to dry before sanding it down. This will create a smooth surface for the new paint to adhere to. Remember to also clean the walls of any dirt or grease using a mild detergent and water. Once everything is dry and clean, you're ready to apply a primer before starting the painting process. Taking the time to properly prepare your walls will result in a professional-looking finish that you can enjoy for years to come. For additional insights, consider exploring reasons a house might not appear on Zillow.
Can you wet sand after painting?
To start, we need to understand the purpose of wet sanding after painting. Wet sanding is typically done to achieve a smooth and flawless finish by removing imperfections such as dust particles or orange peel. However, it is important to note that wet sanding should only be done on certain types of paint and in specific situations. If you have used a single-stage or clear coat paint, wet sanding can be beneficial. However, if you have used a base coat and clear coat system, wet sanding should be avoided unless you are experiencing major flaws. Wet sanding can remove some of the clear coat, potentially affecting the durability and appearance of the finish. It is always recommended to consult with a professional or refer to the manufacturer's guidelines before attempting wet sanding. For more information on related tips, check out this article on returning home goods at Marshalls.
The importance of sanding between coats of paint.
If you want a smooth and professional-looking paint job, it is essential to sand between coats. Sanding helps to create a smooth and even surface, removing any imperfections or rough patches that may have appeared during the application process. By sanding, you also create a surface that allows the next coat of paint to adhere better, resulting in a more durable and long-lasting finish. Additionally, sanding between coats allows you to remove any dust or particles that may have settled on the first coat, ensuring a clean and flawless final result. So, before you apply that second or third coat, don't forget to take the time to sand - it will make a significant difference in the overall appearance and durability of your paint job.
How to fix and sand rough spots after painting.
To start,we need to assess the rough spots on the painted surface. Take a close look and identify any areas that appear uneven or have drips. Once you've identified these spots, gather your materials. You'll need sandpaper with a grit suitable for the surface you're working on and a sanding block to hold the sandpaper securely. You may also find it helpful to have a paint scraper on hand if there are any large drips or raised areas. Begin by carefully sanding the rough areas in a circular motion, applying gentle pressure. Be cautious not to remove too much paint, as this can result in an uneven surface. After sanding, wipe away any dust with a clean cloth and assess the smoothness of the surface. If necessary, repeat the sanding process until you achieve the desired result. Once the surface is smooth, you can touch up the area with fresh paint, blending it seamlessly with the surrounding area. Remember to let the paint dry thoroughly before applying any additional coats or using the surface.
Sanding after painting: how to avoid visible sanding marks.
In order to achieve a smooth, professional finish when sanding after painting, there are a few key points to keep in mind. First, ensure that you are using the correct grit sandpaper for the job. A fine grit sandpaper, such as 220 or higher, is best suited for smoothing out the surface without leaving visible marks. Additionally, it's important to sand in a consistent, even motion, applying gentle pressure. Avoid applying too much pressure or using a coarse grit sandpaper, as this can lead to visible sanding marks. Finally, always make sure to clean the surface thoroughly after sanding to remove any dust or debris that may have accumulated. By following these steps, you can achieve a seamless, professional looking finish on your painted surfaces.
Best sandpaper grits for sanding after painting.
It is important to consider the type of surface you are sanding before deciding on the best sandpaper grit. For sanding after painting, you typically want to use a fine grit sandpaper, such as 220 or 320. This will help smooth out any imperfections or roughness left behind by the painting process. However, if you are dealing with a particularly rough surface or need to remove old paint or stain, you may need to start with a coarser grit, such as 80 or 120, and gradually work your way up to the finer grits. Remember to always sand in a smooth, even motion, and regularly check the surface to ensure you are achieving the desired results. determine if you can put latex paint over oil-based primer.
Sanding furniture after painting: tips and tricks.
If you've recently painted a piece of furniture and you want to give it a smooth and polished finish, sanding is an important step to consider. Sanding helps to remove any imperfections, smooth rough surfaces, and ensure that your paint adheres properly. Before you start sanding, make sure to gather the necessary tools such as sandpaper, sanding block, and a dust mask for safety. Start with a coarse-grit sandpaper to remove any major bumps or drips, then gradually move to finer grits for a smoother finish. Remember to always sand in the direction of the grain and take your time to achieve the desired results. Once you're done sanding, make sure to wipe away any dust particles and apply a protective finish to seal the paint. Sanding your painted furniture can make a significant difference in the overall look and feel, so don't skip this important step. Our goal is to help you achieve the best results possible, and sanding is a key part of that process.
Sanding drywall after painting: steps for a professional finish.
From start to finish, sanding drywall after painting is an important step to achieve a professional finish. To begin, make sure you have the proper materials on hand: a sanding block or sanding sponge, medium-grit sandpaper (around 120-150 grit), and a vacuum or damp cloth for cleaning up. Start by gently sanding the surface of the painted wall using long, sweeping motions. Be sure to sand evenly and avoid applying too much pressure, as this can cause damage. After sanding, use a vacuum or damp cloth to remove any dust or debris. Repeat the process if necessary until you achieve a smooth and even finish. By following these steps, we can ensure a polished and professional result for our drywall surfaces.
Table of Is It Possible to Sand after Painting? Insights and Recommendations
| Paint Type | Sanding Required? |
|---|---|
| Oil-based Paint | No |
| Latex Paint | Yes |
| Acrylic Paint | Yes |
| Chalk Paint | No |