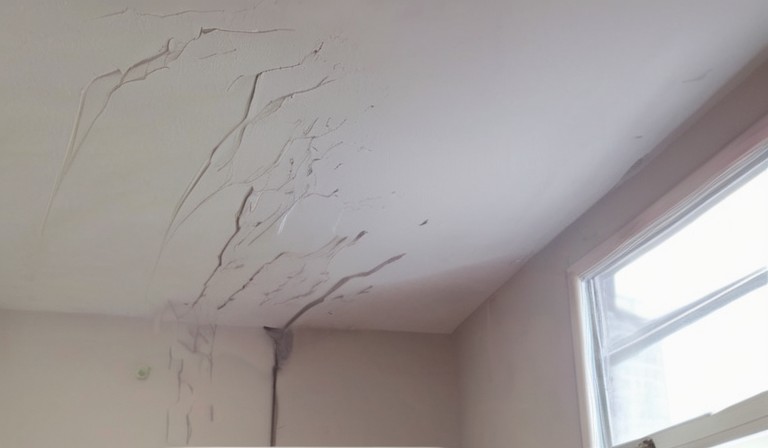
The cracking of your spray paint may be due to several factors. One possibility is that the paint was applied too thickly, causing it to dry unevenly and ultimately crack. Another reason could be inadequate surface preparation, such as not cleaning or sanding the surface properly before applying the paint. Additionally, extreme temperature changes or moisture may cause the paint to crack. To prevent cracking in the future, ensure proper surface preparation, apply thin, even coats, and keep the painted object in a consistent environment.
Common Causes of Spray Paint Cracking.
You may experience spray paint cracking for a few common reasons. One cause could be applying the paint too thickly. When the paint is applied in heavy coats, it can dry unevenly and lead to cracking. Another cause could be improper surface preparation. If the surface is not cleaned or sanded properly before painting, the paint may not adhere properly and result in cracking. Additionally, extreme temperature changes can also cause the paint to crack. It's important to keep in mind these factors when using spray paint so that you can avoid the frustration of cracking and achieve a smooth and professional finish. For more related advice, read our article.
Improper Surface Preparation and Cleaning.
It is important to ensure that you properly prepare and clean surfaces before starting any project. This applies to various tasks such as painting, applying wallpaper, or even installing new flooring. Neglecting this step can result in poor adhesion, a rough finish, or even damage to the surface. To avoid these issues, make sure to remove any dirt, dust, or oil from the surface. You can use a mild detergent and water solution or a specialized cleaning product depending on the surface. Additionally, make sure to fill in any cracks or holes and sand down any rough areas to create a smooth and even surface. By taking the time to properly prepare and clean your surfaces, you will ensure a more successful and long-lasting project.
Application Technique and Environment Factors.
It is important to consider both the application technique and the environmental factors when choosing a paint for your project. First, think about the type of surface you will be painting on. Different surfaces may require different application techniques, such as using a brush or roller. Additionally, consider the environment in which the paint will be applied. Will it be exposed to harsh weather conditions, such as heavy rain or direct sunlight? If so, you may want to choose a paint that is durable and resistant to fading. By taking into account these related entities, you can ensure a successful and long-lasting paint job.
Quality and Compatibility of Spray Paint Products.
It is important to consider the quality and compatibility of spray paint products before you start any painting project. Different surfaces require specific types of paint, so it's crucial to choose the right one. Assess the material you will be painting, whether it's wood, metal, or plastic, and select a spray paint that is designed for that particular surface. Additionally, consider the finish you desire. Do you want a glossy, matte, or metallic finish? Take time to read the product labels and ask for advice at the store to ensure you are selecting the best spray paint for your project. Remember, using the right spray paint will not only enhance the overall appearance but also improve the durability and longevity of your paint job.
Drying and Curing Process.
To ensure the best quality and flavor in your harvested cannabis, its important to follow a proper drying and curing process. Firstly, make sure to trim off any excess leaves and hang the buds upside down in a cool, dark, and well-ventilated space. This allows for proper airflow and prevents mold or mildew from forming. You should aim for a temperature of around 60-70 degrees Fahrenheit with a humidity level of about 50-60%. This will help the buds dry slowly and evenly, preserving their terpene profile and potency. After a few days, you can move on to the curing process. Place the dried buds into airtight containers, such as glass jars, and store them in a cool and dark place for at least two weeks. During this time, make sure to burp the jars daily to release any excess moisture and allow fresh air to circulate. This process helps to enhance the flavor, aroma, and smoothness of the buds. Remember, patience is key when it comes to drying and curing cannabis, so resist the temptation to rush the process. By properly drying and curing your cannabis, you will be rewarded with a high-quality product that you can enjoy for an extended period of time.
Effects of Weather and Temperature Changes.
If you want to protect your skin and stay healthy, it's important to understand how weather and temperature changes can affect you. During hot weather, it's crucial to stay hydrated and keep cool by seeking shade or using fans and air conditioners. Sunscreen is also essential to protect your skin from harmful UV rays. On the other hand, during cold weather, it's important to dress warmly and layer your clothing to retain body heat. You should also moisturize your skin regularly to prevent it from drying out. In both extreme heat and cold, it's important to listen to your body and adjust your activities accordingly. By being aware of the weather and temperature changes, we can take steps to stay comfortable and healthy. For more detailed measures to protect your home during colder months, read about preventing frozen pipes.
Impact of Humidity and Moisture.
If you live in an area with high humidity, it is important to be aware of the impact it can have on various aspects of your life. Moisture can affect not only the condition of your home, but also your health and overall well-being. Excess humidity can lead to the growth of mold and mildew, which can cause respiratory issues and allergies. It can also damage furniture, walls, and other items in your home. To combat these problems, you can invest in a dehumidifier to reduce moisture levels. Additionally, proper ventilation and regular maintenance of your HVAC system will help control humidity. Moreover, it's crucial to ensure that your bathrooms and kitchens are well-ventilated to prevent the buildup of moisture. By taking these simple steps, we can maintain a comfortable and healthy environment in our homes. For more information on this topic, read the full article here.
Importance of Primer and Base Coats.
On any home improvement project, it is crucial to prioritize the use of primer and base coats. These products play a vital role in ensuring the overall quality and durability of your paint job. Before you start applying your desired color, make sure you prepare the surface properly by applying a coat of primer. Primer helps to even out the surface, hide imperfections, and provide a smooth base for the final coat of paint. Additionally, using a base coat can enhance the color and prevent it from appearing uneven or streaky. By investing a little extra time and effort in using primer and base coats, you can ensure a professional finish that lasts for years.
Tips for Preventing Spray Paint Cracking.
From our experience, there are a few steps you can take to prevent spray paint from cracking on surfaces. First, make sure to clean and prepare the surface properly. This means removing any dirt, grease, or old paint that may be present. Secondly, choose the right type of spray paint for your project. Different surfaces require different types of paint, so make sure to do your research or consult with a professional if needed. Additionally, its important to apply thin, even coats of paint rather than trying to cover the entire surface in one go. This helps the paint to dry more evenly and reduces the likelihood of cracking. Finally, consider using a clear coat or sealant over the top of the spray paint to add an extra layer of protection. By following these steps, you can help ensure a smooth and long-lasting finish for your spray paint project. For more information, you can read this article on why you might hear banging in your house at night.
Potential Solutions for Fixing Cracked Spray Paint.
When our spray paint starts to crack, it can be frustrating. However, there are a few potential solutions you can try to fix the issue. First, you can lightly sand the cracked area to create a smooth surface. Next, apply a primer to the sanded area, allowing it to dry completely. Once the primer is dry, you can apply a fresh coat of spray paint, making sure to follow the directions on the can. If the crack is still visible after one coat, you can apply additional coats until the surface looks even. Remember to spray from a consistent distance and use smooth, overlapping strokes. Additionally, its important to avoid spraying in extremely hot or humid conditions, as this can affect the drying process. By following these steps, you can fix the cracked spray paint and restore the look of your item.
Table of Understanding the Causes of Cracking in Spray Paint: Exploring Potential Factors
| Reasons for Spray Paint Cracking | |
|---|---|
| 1. | Applying coats too thickly. |
| 2. | Improper surface preparation. |
| 3. | Painting in extreme temperatures. |
| 4. | Using incompatible paint or primer. |
| 5. | Not allowing sufficient drying time between coats. |
| 6. | Painting over dirty or greasy surfaces. |
| 7. | Exposing the painted surface to excessive moisture. |
| 8. | Applying paint too quickly or too slowly. |