No, it is not recommended to paint acrylic directly over oil. Acrylic paint is water-based, while oil paint is oil-based, and the two types of paint do not mix well together. The oil paint can prevent the acrylic from adhering properly and could cause cracking or peeling over time. It is best to either remove the oil paint or prime the surface before applying acrylic paint.
Compatibility of Acrylic and Oil Paints.
From my comprehension, it seems that you are wondering about the compatibility of acrylic and oil paints. When it comes to mixing these two types of paints, it's important to note that they have different properties and drying times. Acrylic paints are water-based and dry quickly, while oil paints are oil-based and take longer to dry. It is generally recommended to avoid painting acrylic over oil, as the different drying times can cause cracking or other issues. However, you can paint oil over acrylic once the acrylic layer is fully dried. It's always a good idea to test compatibility on a small, inconspicuous area before applying it to your entire artwork. Remember to clean your brushes thoroughly when switching between these two types of paints. For further reading, I found an excellent article that might interest you: why do old houses smell.
Steps for Painting Acrylic over Oil.
While acrylic paint and oil paint are both popular mediums for artists, they have different properties and require specific techniques when used together. Before you begin, it's important to understand the compatibility of these two paints. Acrylic paint can be applied over dry oil paint, but not the other way around. Now, let's walk through the steps for successfully painting acrylic over oil. First, ensure that the oil paint has fully dried and cured, which usually takes several months. Next, lightly sand the surface to create a rough texture for the acrylic paint to adhere to. Clean the surface to remove any dust or debris. Apply a layer of acrylic gesso as a primer to improve adhesion. Once the gesso is dry, you can start painting with acrylics. Remember to use thin layers and let them dry completely before applying the next layer. Finally, finish off with a varnish to protect your artwork.
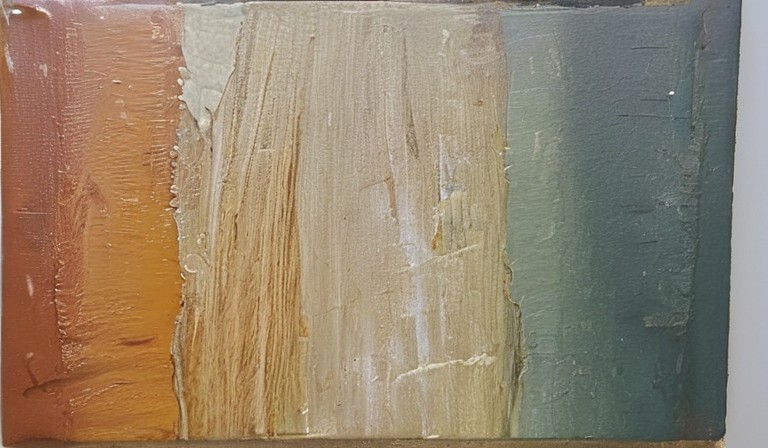
Tips for Achieving a Smooth Surface.
If you want to achieve a smooth surface, there are a few tips you can follow. First, make sure the surface is clean and free of any debris or loose materials. This will help ensure that your finish is smooth and even. Next, consider using a primer or sealer before applying your chosen paint or coating. This will help create a smooth base and improve adhesion. Additionally, using high-quality materials and tools can make a big difference. Invest in good paint brushes or rollers, and choose a high-quality paint or coating that is specifically designed for the surface you are working on. Finally, take your time and be patient. Applying multiple thin coats, allowing proper drying time between each coat, will help you achieve a smooth and professional-looking finish. For more detailed guidance, read our comprehensive guide on painting propane tanks.
Drying Time Differences.
It is crucial to consider the drying times of different materials before you start a project. Not only will this help you plan your time effectively, but it will also ensure the best possible results. Different materials, such as paint or adhesive, have varying drying times, and failing to account for this can lead to a messy and uneven finish. Take the time to read the instructions on each product and calculate the required drying time. It might be tempting to rush through a project, but allowing the materials to dry fully will ensure a durable and professional-looking outcome.
Adhesion and Layering Techniques.
When working on a painting or any art project that involves layers and adhesive materials, it's important to consider certain techniques. First, make sure to properly prepare the surface you'll be working on. This includes cleaning it thoroughly and ensuring it's dry. Next, carefully choose the adhesives and layering materials that are compatible with both the surface and the materials you'll be using. Test them on a small area to ensure they adhere well and don't cause any damage. When layering, start with lighter materials and gradually build up to heavier ones, allowing each layer to dry completely before adding the next. This will help create a sturdy and cohesive final piece.
Prepping the Oil Painting Surface.
While each oil painting surface has its own unique qualities, it's important to prepare it properly to ensure the best results for your artwork. Before you dive into painting, take some time to assess the surface you'll be working on. Is it canvas, wood, or a different material? If it's canvas, make sure it's stretched tightly and securely. For wood surfaces, check for any rough patches or imperfections that may need to be sanded down. It's also a good idea to apply a primer or gesso to create a smooth and stable surface for the paint to adhere to. Remember, proper preparation sets the foundation for a successful oil painting.
Compatibility of Brushes and Mediums.
For optimal results in your artistic endeavors, it is important to consider the compatibility of brushes and mediums. Different brushes are designed for specific purposes and mediums have unique properties. Before you begin your creative process, take a moment to assess the type of brush you have and the medium you will be using. Is it a round brush for precise detailing or a flat brush for broad strokes? Will you be working with watercolors or oils? Understanding the characteristics of your brushes and mediums will allow you to make informed choices, resulting in a more enjoyable and successful artistic experience. Remember, compatibility between brushes and mediums ensures that we can achieve the desired effects and maintain the quality of our artwork. Discover why US houses are typically made of wood.
Potential Challenges and Solutions.
The potential challenges that you may face when designing your front porch can vary depending on the type of porch and your individual preferences. One challenge could be limited space, especially if you have a small front porch. In this case, you may need to prioritize what elements are most important to you and make efficient use of the available space. Another challenge could be finding the right balance between functionality and aesthetics. It's important to ensure that your front porch is not only visually appealing but also serves its intended purpose, whether it's for seating, entertaining, or simply enhancing the curb appeal of your home. Finally, weather conditions can also pose a challenge, especially if you live in an area with harsh winters or extreme heat. Consider using weather-resistant materials and accessories to ensure that your front porch remains durable and comfortable throughout the year. By carefully considering these challenges and finding suitable solutions, you can create a beautiful and functional front porch that reflects your personal style. For those considering incorporating unique paint effects into their design, exploring the possibility of mixing acrylic and wall paint might offer some interesting opportunities.
How to Create Texture and Effects.
To create texture and add special effects to your artwork, we can explore various techniques and materials. First, consider the type of effect you want to achieve. Do you want to create a rough, gritty texture or a smooth, glossy surface? Once you have a clear idea, you can start experimenting with different tools and mediums. For example, you can use brushes with bristles of varying thickness to create different textures. You can also try using palette knives or sponges to add interesting patterns and effects. Another option is to mix different mediums, such as acrylic paint with modeling paste, to create a three-dimensional texture. Remember to practice and experiment with different techniques to find the ones that work best for you. Don't be afraid to make mistakes - it's all part of the creative process. So have fun, explore your artistic style, and let your imagination take you on a texture-filled journey!
Recommended Brands and Products.
It is important to choose brands and products that are known for their quality and reliability. When selecting items for your home, consider well-established and reputable brands. Look for brands that have a track record of providing durable and long-lasting products. This applies to everything from appliances and furniture to electronics and home decor. By investing in trusted brands, you can ensure that your purchases will stand the test of time and provide you with the functionality and style you desire. Furthermore, don't forget to read reviews and compare prices to make sure you are getting the best value for your money. Remember, our goal is to create a comfortable and inviting living space, and choosing the right brands and products is an important step towards achieving that goal.
Table of Can You Paint Acrylic Over Oil? A Guide to Layering Different Paints
| Paint Type | Compatibility |
|---|---|
| Acrylic | No |
| Oil | Yes |