Yes, we can definitely paint a ceiling fan for you.
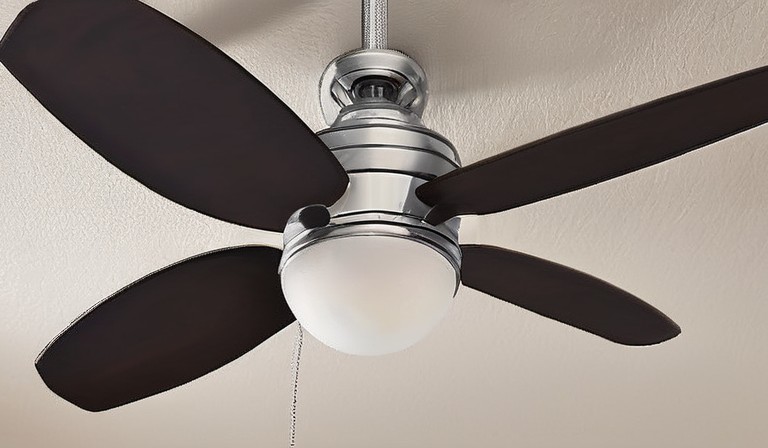
Steps to Paint a Ceiling Fan.
Even if you may not have thought about it before, painting a ceiling fan can be a simple and cost-effective way to update its appearance. First, assess the condition of your ceiling fan. Is it in good working order? Does it need any repairs or cleaning? Once that's taken care of, gather your materials: primer, paint, paintbrushes, and a drop cloth to protect your surrounding space. Before you start painting, make sure to turn off the power to the fan and remove any blades or other detachable parts. Now you can begin by applying a coat of primer to ensure the paint adheres properly. Once the primer is dry, you can then proceed to paint your ceiling fan with the color of your choice. Remember to take your time and apply multiple thin coats for a smooth and even finish. Once the paint is dry, reassemble your fan and enjoy the fresh, updated look in your space.
Tools and Materials Needed for Painting a Ceiling Fan.
First, you'll need to gather all the necessary tools and materials for painting a ceiling fan. This includes a drop cloth to protect the surrounding area from any potential paint splatters or drips. A pair of gloves will also come in handy to protect your hands. You will need a good quality paintbrush suitable for the size of the fan blades and a small roller brush for any larger areas. Additionally, make sure to have a can of primer specifically designed for metal surfaces, as well as the desired color of paint for the fan blades. Sandpaper or a sanding block will be useful for preparing the surface before painting. Lastly, have a clean cloth or rag ready for any spills or to wipe off excess paint.
Preparing the Ceiling Fan for Painting.
A ceiling fan can be a great addition to any room, providing comfort and style. If you are planning to paint your ceiling fan to match your rooms decor, there are a few steps you can take to ensure a smooth and successful project. First, before you begin, make sure to turn off the power to the fan at the breaker box to avoid any accidents. Then, using a screwdriver, remove the fan blades from the motor housing. This will make it easier to paint each blade individually. Next, use a gentle degreasing cleaner to remove any dirt or dust from the blades. Once the blades are clean and dry, sand them lightly with fine-grit sandpaper to create a rough surface for the paint to adhere to. Wipe away any excess dust and then you're ready to start painting. Cover the motor housing and any other parts of the fan that you don't want to be painted with painter's tape and plastic sheeting. Apply a primer coat to the blades, allow it to dry, and then apply your desired color of paint, using even strokes. Allow the paint to dry completely before reattaching the blades to the motor housing and turning on the power. With these simple steps, you can transform your ceiling fan into a beautiful and coordinated element of your room's design.
Choosing the Right Type of Paint for the Ceiling Fan.
The ceiling fan is an essential part of our home, providing us with cool air and making our living spaces more comfortable. If you're considering giving your ceiling fan a fresh coat of paint, it's important to choose the right type of paint for the job. First, you'll need to determine the material of your ceiling fan. Is it made of wood, metal, or plastic? Each material requires a different type of paint for optimal results. For wooden ceiling fans, opt for a paint that is specifically designed for wood surfaces. For metal fans, choose a paint that is suitable for metal surfaces, ensuring durability and a smooth finish. Plastic ceiling fans require a paint that adheres well to plastic surfaces and can withstand outdoor exposure if your fan is located outside. By selecting the right type of paint, you can give your ceiling fan a fresh look that complements your overall decor.
Painting Techniques for a Smooth Finish.
An important factor to consider when painting a wall is the type of paint you choose. For a smooth and flawless finish, it's recommended to use a high-quality paint that is specifically designed for the surface you are painting. Before starting the painting process, ensure that the wall is clean and free from any dust or debris. This will help the paint adhere better and result in a smoother finish. It's also essential to use the right tools, such as brushes or rollers, that are appropriate for the type of paint you are using. Applying thin and even coats of paint will prevent drips and create a professional look. Finally, allowing sufficient drying time between coats will ensure a smooth and even finish. By following these tips, you can achieve a beautiful and flawless painted wall that will enhance the overall look of your space.
Tips for Painting the Blades of the Ceiling Fan.
The blades of your ceiling fan can be a great opportunity to add a pop of color or a touch of elegance to your space. Before you begin the process, make sure you have all the necessary supplies, such as paint, primer, and brushes. Clean the blades thoroughly to remove any dust or debris and ensure a smooth surface for painting. It's important to prime the blades first to help the paint adhere better and provide a more even finish. When applying the paint, use long, even strokes in the direction of the blade. Allow each coat to dry completely before applying the next one. Remember to avoid getting paint on any other parts of the fan. By following these simple steps, you can transform the look of your ceiling fan and create a cohesive design in your room.
Drying and Curing Time for the Paint.
While painting a room or a piece of furniture can be a fun and rewarding experience, it's important to remember that proper drying and curing time is crucial. Each type of paint, whether it's latex or oil-based, has its own recommended drying and curing time. Before you start painting, make sure you read and follow the instructions provided by the manufacturer. This will give you an idea of how long you should wait before applying another coat or moving furniture back into the room. Rushing the drying process can result in a poor finish and potentially damage your newly painted surface. So, take the time to allow the paint to fully dry and cure before moving forward. It's worth the wait! For more ideas to enhance your home interior after the painting project is complete, consider taking a quiz to discover your house style.
Safety Precautions when Painting a Ceiling Fan.
When painting a ceiling fan, it's important to prioritize safety for both you and the fan itself. First, make sure to turn off the power to the fan at the circuit breaker before starting any work. This will help prevent any accidents or electrocution. Secondly, protect the surrounding area by using drop cloths or plastic sheets to cover furniture and the floor. This will prevent any paint splatters or drips from damaging your belongings. Lastly, consider using a ladder or step stool that is stable and secure when painting the fan. This will help you reach all areas without risking injury. By taking these precautions, we can ensure a safe and successful paint job on our ceiling fans. If you are considering more unconventional DIY projects, learn how to paint roof shingles.
Maintenance and Cleaning of Painted Ceiling Fan.
An important aspect of keeping your painted ceiling fan looking its best is regular maintenance and cleaning. Over time, dust and dirt can accumulate on the fan blades, resulting in a drab appearance. To prevent this, it is recommended that you clean the blades at least once every few months. Start by turning off the fan and placing a drop cloth or newspaper underneath to catch any falling debris. Using a soft, damp cloth, gently wipe the blades, being careful not to apply too much pressure. If the blades are particularly dirty, you may need to use a mild cleaning solution, such as a mixture of water and gentle dish soap. After cleaning, ensure that the blades are completely dry before turning the fan back on. Additionally, it is also a good idea to check the motor and other mechanical components to ensure they are in good working order. By taking these simple steps, we can keep our painted ceiling fans looking their best and functioning efficiently for years to come. For more tips on maintaining a stylish home, consider exploring the possibilities of staining over paint.
Advantages of Painting a Ceiling Fan.
It is recommended that you consider painting your ceiling fan if you are looking to update the look of your room. Painting your ceiling fan not only allows you to choose a color that complements your existing decor, but it can also help to extend the life of your fan. When choosing a paint color, opt for a shade that coordinates with the color scheme of your room. It is also important to use a paint that is specifically designed for use on metal or plastic surfaces to ensure the best results. Additionally, before painting, make sure to thoroughly clean the fan blades and remove any dust or debris. By taking these steps, you can easily transform your ceiling fan and create a cohesive look in your space. For more details, read the full article on painting over existing paint.
Table of Can You Paint a Ceiling Fan: A Step-by-Step Guide to Transforming Your Fan
| Question | Response |
|---|---|
| Can you paint a ceiling fan? | Yes |
| What kind of paint should I use? | Acrylic or latex paint is recommended |
| Do I need to prepare the fan before painting? | Yes, clean the surface and remove any dust or grease |
| Should I remove the fan blades before painting? | It's usually easier to paint with the blades removed |
| How many coats of paint should I apply? | Two coats are generally recommended for best results |
| How long does it take for the paint to dry? | Drying time can vary, but typically a few hours to overnight |
| Can I paint a ceiling fan that has metal blades? | Yes, using a metal-approved paint is necessary |