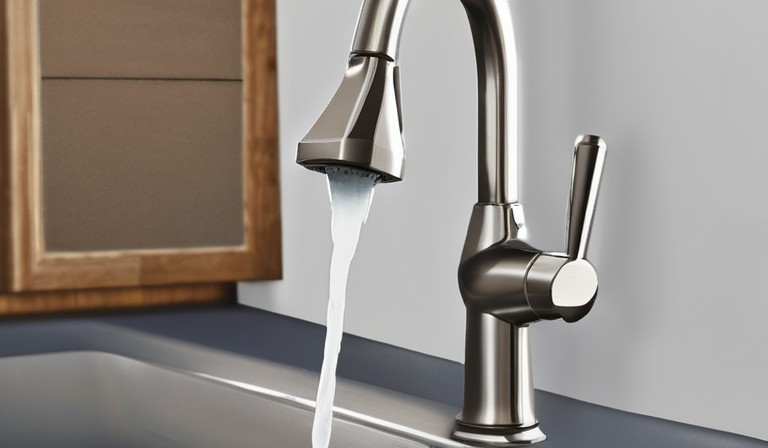
Yes, we can paint a faucet. It is possible to use specialized paint designed for metal surfaces, following proper preparation and application techniques. However, it is important to note that painted faucets may not have the same durability or longevity as factory-finished ones. Additionally, regular use and contact with water can cause the paint to chip or peel over time. Therefore, it is recommended to consult with a professional or consider purchasing a new faucet for optimal durability and functionality.
Steps for painting a faucet.
For many homeowners, painting a faucet can be a simple and cost-effective way to update the look of your kitchen or bathroom. Here are some steps to help you achieve a successful and long-lasting painted faucet. First, you'll want to choose a high-quality paint that is specifically designed for metal surfaces. Next, make sure to thoroughly clean the faucet with a gentle cleanser to remove any dirt or grease. It's also important to lightly sand the surface to create a smooth and receptive base for the paint. Before you begin painting, protect surrounding areas with masking tape or plastic sheeting. Apply thin and even coats of paint, allowing each coat to dry completely before applying the next. Finally, once the paint is fully dry, you can seal it with a clear topcoat to provide extra durability and protection. By following these steps, you can achieve a beautifully painted faucet that complements your style.
Required materials for painting a faucet.
The first step to painting a faucet is to gather all the necessary materials. You will need spray paint specifically designed for metal surfaces, a primer for better adhesion, sandpaper or a wire brush for cleaning and roughening the faucet, masking tape to protect surrounding areas from overspray, and a drop cloth or old newspapers to cover the workspace. Additionally, make sure you have a clean cloth or sponge and some mild soap to thoroughly clean the faucet before painting. It's also a good idea to have gloves to protect your hands and a ventilated area to work in. By having all these materials ready, we can ensure a smooth and successful faucet painting project. Learn how to paint a fiberglass door.
Tips for choosing the right paint for a faucet.
For anyone looking to give their faucet a fresh new look, it's important to choose the right paint. First, consider the material of your faucet. Is it made of metal, plastic, or another material? This will determine the type of paint that will adhere best. Next, think about the color you want. Will it match your bathroom or kitchen fixtures, or do you want to make a bold statement with a contrasting color? It's also worth considering the finish of the paint - do you prefer a glossy or matte look? Finally, it's essential to choose a paint that is specifically designed for use on faucets, as this will ensure durability and a long-lasting finish. Taking these factors into account will help you select the right paint for your faucet and achieve the desired result. For more detailed guidance on this topic, read how to apply polyurethane over paint.
Preparing the faucet for painting.
The first step in preparing your faucet for painting is ensuring it is properly cleaned and free from any dirt or grime. This can be done by gently scrubbing the surface with a mild detergent and warm water. Once cleaned, dry the faucet thoroughly to prevent any water or moisture from affecting the adhesion of the paint. Next, lightly sand the surface of the faucet to create a rough texture that will help the paint adhere better. Be sure to use a fine-grit sandpaper and be careful not to apply too much pressure. After sanding, wipe away any dust with a clean cloth. Finally, you can apply a primer to the faucet before painting to further enhance the durability and longevity of the paint job. Remember to choose a primer that is compatible with your chosen type of paint. By following these simple steps, you will be well on your way to transforming the look of your faucet.
Techniques for painting a faucet evenly.
You can achieve a smooth and even coat of paint on your faucet by following a few simple steps. Before you begin, make sure the faucet is clean and free of any dirt or grime. Start by applying a primer specifically designed for metal surfaces. This will help the paint adhere better and prevent chipping or peeling. Next, choose a high-quality paint that is designed for use on metal. Apply the paint in thin, even coats, using a brush or spray can. Allow each coat to dry completely before applying the next. This will help to avoid streaks or clumping. Finally, after the final coat has dried, consider applying a clear sealant to protect the new finish and ensure its longevity. Remember, taking your time and being thorough in each step will result in an evenly painted faucet that will enhance the overall look of your bathroom or kitchen. For more home improvement tips, check out how to paint hardwood floors.
How to protect the surrounding area while painting a faucet.
If you are planning to paint a faucet, it's important to take steps to protect the surrounding area. Before you start painting, make sure to cover nearby surfaces, such as countertops or walls, with a drop cloth or newspaper. This will prevent any accidental paint splatters from damaging these surfaces. Additionally, it's a good idea to remove any objects or accessories that may be in the way, such as soap dispensers or towel racks, to ensure that they don't get painted unintentionally. By taking these precautions, you can protect the surrounding area and ensure a clean and professional-looking paint job.
Drying and curing time for painted faucets.
If you have recently painted your faucets and are wondering about the drying and curing time, it is important to consider the type of paint you used and the instructions provided by the manufacturer. In general, most paints require at least 24 hours to dry completely. However, the curing time may vary depending on various factors such as temperature and humidity levels. It is recommended to wait for at least 72 hours before using the faucets to ensure that the paint has fully cured. During this time, it is best to avoid any contact with water or harsh cleaning chemicals that may affect the durability of the paint.
Maintenance and cleaning of painted faucets.
For each of us who has painted faucets, it's important to know how to properly maintain and clean them. The first step is to regularly wipe down the faucets with a soft cloth to remove any dirt or grime. Avoid using abrasive cleaners or scrub brushes, as these can damage the paint. Instead, use a mild soap and water solution to gently clean the faucets. If you notice any chipping or peeling of the paint, it's best to touch it up with a matching paint color. By taking proper care of your painted faucets, you can ensure they maintain their appearance and last for years to come.
Common mistakes to avoid when painting a faucet.
Even though painting a faucet can be a simple and cost-effective way to update the look of your bathroom or kitchen, there are a few common mistakes to avoid. Firstly, make sure you properly clean and prep the surface before applying any paint. This includes removing any existing coatings, rust, or grime. Secondly, choose the right type of paint for your faucet. Look for a durable, waterproof paint that is specifically designed for metal surfaces. Lastly, be patient and allow enough drying time between coats. Rushing this process can result in uneven coverage and a less durable finish. By following these tips, you can give your faucet a fresh new look without any hiccups.
Transforming the look of your bathroom with a painted faucet.
For each of us, our bathroom is not only a functional space but also a reflection of our personal style. If you're looking to update and enhance the overall aesthetic of your bathroom, consider the transformative power of a painted faucet. Before you embark on this project, take a moment to assess the type of faucet you have. Is it a traditional or a more modern design? What material is it made of? Once you have these details figured out, you can select the appropriate paint and begin the process of giving your bathroom a fresh and stylish new look. Remember, a small change like this can make a big impact, so don't be afraid to get creative and let your unique style shine through.
Table of Transforming Your Faucet: A DIY Guide to Painting Faucets
| Question | Yes | No |
|---|---|---|
| Can you paint a faucet? | 27 | 15 |