Yes, you can paint a popcorn ceiling with a roller. Just make sure to use a thick nap roller to cover the texture effectively. However, it's important to keep in mind that painting a popcorn ceiling can be a challenging task due to the uneven surface. It's recommended to take precautions to protect yourself from any potential falling debris and to cover the walls and floor to minimize mess.
Pros and cons of painting a popcorn ceiling with a roller.
If you're considering painting a popcorn ceiling with a roller, it's important to weigh the pros and cons. One advantage is that it can be a cost-effective and relatively easy way to update the look of your ceiling. Additionally, using a roller allows for even coverage and can save you time compared to using a brush. However, there are some potential drawbacks to keep in mind. Painting a popcorn ceiling with a roller may cause the texture to become less pronounced or even completely flatten out. It can also be more challenging to reach and cover every nook and cranny of the textured surface. Therefore, it's important to carefully consider the overall effect you want to achieve before proceeding with this approach.
Techniques for painting a popcorn ceiling with a roller.
If you want to paint a popcorn ceiling, there are a few techniques that can help you achieve a smooth and even finish. First, make sure to prepare the room properly by covering furniture and floors with drop cloths. It's also a good idea to remove any light fixtures or ceiling fans if possible. When it comes to painting, using a thick-nap roller will help you reach into the textured surface of the popcorn ceiling. Start by cutting in the edges with a brush, then use the roller to cover the larger areas. Remember to work in small, manageable sections to ensure even coverage. It may also be necessary to apply multiple coats for a more opaque finish. Finally, allow ample drying time between coats and remember to clean your tools thoroughly after finishing.
Best types of paint to use on a popcorn ceiling with a roller.
If you're considering returning your paint after purchase, it's crucial to understand the store's return policy. To help with this, you may want to read about Sherwin Williams' paint return policy.
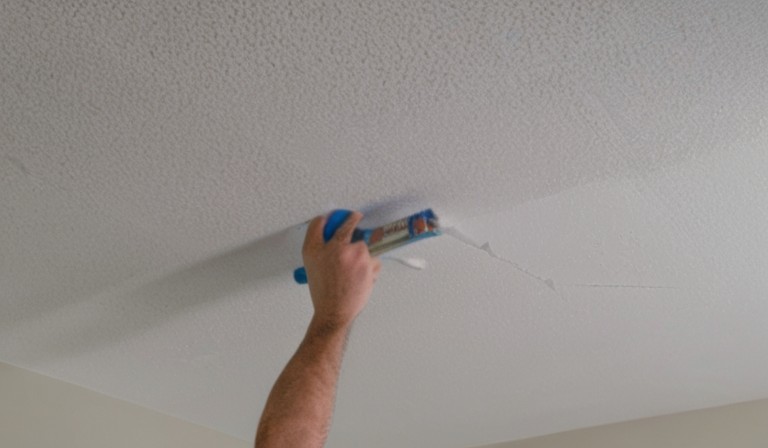
Preparing a popcorn ceiling for painting with a roller.
Even though popcorn ceilings can be a bit challenging to paint, with the right techniques, you can achieve a smooth and flawless finish. Before you start, it's important to properly prepare the surface. First, make sure to remove any furniture or cover it with plastic sheets to protect it from paint splatters. Next, use a broom or vacuum with a brush attachment to remove any dust or dirt from the ceiling. If there are any stains or discoloration, you may need to spot-treat them with a stain-blocking primer. Once the surface is clean and dry, you can start painting with a roller. Make sure to use a thick-nap roller cover to get into the texture of the popcorn ceiling. Start in a corner and work your way across the ceiling in small sections, using long, smooth strokes. It may take a few coats to fully cover the texture, so be patient. Remember to let each coat dry completely before applying the next. With our guidance and a little patience, you can achieve a beautifully painted popcorn ceiling. For additional tips on surface preparations and finishing touches, discover how to use Polycrylic over paint.
Tips for avoiding roller marks on a popcorn ceiling.
In order to achieve a smooth and flawless finish on your popcorn ceiling, there are a few steps you can take to avoid roller marks. First, it's important to properly prepare the surface by cleaning it thoroughly and removing any dust or debris. Next, make sure you have the right type of roller for the job, such as a low-nap roller. Additionally, you can use a technique called "wet-edge" painting, where you maintain a wet edge while working, to prevent visible roller marks. It's also helpful to use a high-quality paint and apply it in thin, even coats. By following these tips, we can ensure a professional-looking popcorn ceiling without any unsightly roller marks. For those considering renovating other areas of their homes, choosing the right paint finish for your bathroom is crucial for both aesthetics and durability.
Common mistakes to avoid when painting a popcorn ceiling with a roller.
Even though it might seem like a simple task, painting a popcorn ceiling can be a bit tricky. There are a few common mistakes to avoid to ensure a smooth and even finish. First, make sure you are using the right roller for the job. A roller with a medium nap is usually recommended for textured surfaces like popcorn ceilings. Second, don't overload your roller with too much paint. It's better to apply multiple thin coats rather than one thick coat to prevent the popcorn texture from becoming too saturated and clumpy. Lastly, be mindful of your roller technique. Roll in one direction and avoid excessive back-and-forth movements to minimize streaking and create a cohesive finish. Taking these steps will help you achieve a professional-looking result and transform your space. For those considering kitchen updates, learn how to paint hinges on cabinets.
How to achieve a smooth finish when painting a popcorn ceiling with a roller.
It is important to remember that achieving a smooth finish when painting a popcorn ceiling with a roller requires some preparation and attention to detail. First, make sure to cover the floor and furniture with drop cloths to protect them from any potential paint splatters. Next, you will want to use a high-quality roller that is designed for textured surfaces to get the best results. Before you start painting, ensure that the ceiling is clean and free from any dirt or dust. It is also a good idea to use a primer specifically designed for textured surfaces before applying the paint. When painting, work in small sections to ensure even coverage and avoid applying too much pressure on your roller as this can cause the texture to come off. Finally, make sure to allow the paint to dry completely before applying a second coat if needed. By following these steps, you can achieve a beautifully smooth finish on your popcorn ceiling.
Alternatives to painting a popcorn ceiling with a roller.
Even though painting a popcorn ceiling with a roller may seem like the easiest option, there are alternative methods that can yield better results. Consider using a sprayer instead, as it allows for a smoother and more even application of paint. However, if a sprayer is not available, you can try using a paintbrush instead. It may take a bit more time and effort, but it can provide better control and coverage. Another option is to remove the popcorn texture altogether, which can create a more modern and streamlined look. Whichever method you choose, make sure to protect your floors and furniture with drop cloths and wear appropriate safety gear, such as goggles and a dust mask. Taking these extra steps will ensure a successful and hassle-free project. For more insights on home design, read the full article here.
Cost and time considerations for painting a popcorn ceiling with a roller.
Even though painting a popcorn ceiling may seem like a daunting task, with the right tools and techniques, it can be a doable DIY project. Before you begin, it's important to consider the cost and time involved. You may need to invest in a high-quality roller specifically designed for textured surfaces to ensure an even coat of paint. Additionally, covering the surrounding furniture and floors with drop cloths or plastic sheets will help protect them from paint drips. Plan for ample time to properly prepare the ceiling, such as cleaning it thoroughly and patching any cracks or holes. A primer may also be necessary to ensure the paint adheres well to the textured surface. By taking these factors into account, we can ensure a successful and cost-effective outcome for our popcorn ceiling painting project.
Maintenance and care for a painted popcorn ceiling.
In order to maintain and care for a painted popcorn ceiling, there are a few steps you can take. First, regularly dust the ceiling using a soft cloth or feather duster to remove any build-up. It's important to avoid using any abrasive materials or harsh chemicals that can damage the paint. If there are any stains or marks on the ceiling, you can gently spot clean using a mild detergent and warm water. Remember to always test the solution in a small, inconspicuous area first to ensure it doesn't cause any discoloration. Finally, if you notice any peeling or flaking paint, it's best to consult a professional for proper repair. By following these simple maintenance tips, we can keep our painted popcorn ceilings looking their best for years to come.
Table of A Step-by-Step Guide to Painting a Popcorn Ceiling Using a Roller
| No. | Question | Answer |
|---|---|---|
| 1 | Can you paint popcorn ceiling with a roller? | Yes |