Yes, you can spray paint light fixtures. However, it is important to make sure that you follow proper safety precautions and use the appropriate type of spray paint designed for the material of your light fixture. We recommend thoroughly cleaning the fixture, applying a primer if necessary, and using several light coats of spray paint to achieve an even finish. It is also recommended to consult the manufacturer's guidelines or seek professional advice for specific instructions on how to safely spray paint your particular light fixture.
How to safely spray paint light fixtures.
The safety of spraying paint on light fixtures is of utmost importance, so let's go through the steps together. First, ensure that the power to the fixtures is turned off. This will prevent any potential electrical hazards. Next, remove the light fixtures from their mounting and take them to a well-ventilated area. You can protect the surrounding surfaces by placing a drop cloth or old newspaper underneath. Before spraying, clean the fixtures thoroughly to remove any dirt or grime. Use a mild soap and water solution, and allow them to fully dry. Now, apply a primer suited for metal surfaces to ensure proper adhesion of the paint. Once the primer is dry, you can begin spraying with your chosen paint color. Remember to apply thin, even coats and allow each coat to dry before applying the next. Finally, once the paint has dried completely, you can safely reattach the fixtures and turn the power back on. Always prioritize safety and follow the manufacturer's guidelines for the best results.
DIY tips for spray painting light fixtures.
If you're looking to update the look of your light fixtures, spray painting can be a cost-effective and fun DIY project. Before you start, it's important to properly prepare and select the right paint for the job. First, make sure to clean and dry the fixtures thoroughly. Remove any old paint or rust using sandpaper or a wire brush. Cover any areas you don't want to paint with painter's tape and newspaper. When selecting spray paint, opt for one specifically designed for metal or plastic surfaces, depending on the material of your fixture. Apply several thin coats, allowing each coat to dry before adding the next. This helps ensure an even and smooth finish. Don't forget to wear protective goggles and a mask for your safety. Happy spray painting! For your baseboards, consider the right type of paint to enhance their durability and appearance.
Best spray paint brands for light fixtures.
You may be wondering which spray paint brands are the best for light fixtures. When it comes to painting light fixtures, you want to ensure that the paint adheres well and gives a smooth, long-lasting finish. Two popular and reliable brands for spray paint are Rust-Oleum and Krylon. Both of these brands offer a wide range of colors and finishes, allowing you to find the perfect match for your style and decor. Before starting the painting process, remember to clean the light fixture thoroughly and properly prep it by sanding or using a primer if necessary. This will help the paint adhere better and create a more even finish.
Preparing light fixtures for spray painting.
It is important to properly prepare your light fixtures before spray painting them to ensure a smooth and long-lasting finish. First, remove any bulbs or electrical components from the fixtures. Next, clean the surfaces of the fixtures with a mild soap and water solution to remove any dirt or grime. If there are any existing finishes or coatings, you may need to lightly sand the surfaces to create a better adhesion for the spray paint. After sanding, wipe down the fixtures again to remove any dust. Finally, cover any areas that you do not want to paint, such as sockets or switches, with painter's tape. Taking these steps will help ensure that your spray painting project turns out beautifully and that your light fixtures remain in great condition.
Common mistakes to avoid when spray painting light fixtures.
From the type of porch you have to the types of plants that thrive in your climate, there are many factors to consider when designing your outdoor space. It's important to take a step back and think about what you want to achieve with your porch. Do you want it to be a welcoming entrance to your home, or a cozy spot for relaxation? Once you have a clear vision in mind, you can start making decisions about the design elements. Consider the size of your porch and how much seating you want to provide. Will you need a table for drinks and snacks? Do you want to incorporate plants or other decorative elements? These are all important questions to ask yourself before you start designing. Remember, your porch should reflect your personal style and be a place where you can relax and enjoy the outdoors.
Techniques for achieving a smooth finish on spray painted light fixtures.
The key to achieving a smooth finish on spray painted light fixtures is proper preparation and technique. Before you begin painting, it's important to clean the surfaces of the fixtures thoroughly to remove any dirt or grease. You can use a mild detergent and warm water for this step. Once the fixtures are clean and dry, you can start applying the spray paint. To ensure an even and smooth application, hold the can about 8 to 12 inches away from the surface and spray in a steady, sweeping motion. Avoid spraying too close or in one spot for too long to prevent drips or uneven coverage. It's also helpful to apply several thin coats, allowing each coat to dry before applying the next. This will help to build up a smooth and flawless finish. Finally, let the painted fixtures dry completely before reinstalling them to avoid any smudging or damage.
Different effects and finishes you can achieve when spray painting light fixtures.
You can achieve different effects and finishes when spray painting light fixtures. Before you begin, make sure to clean the fixtures thoroughly to ensure proper adhesion of the paint. Consider the style and color scheme of your space when choosing a paint color. You can opt for a metallic finish to add a touch of elegance or go for a bold, contrasting color to make a statement. Take the fixtures down and place them on a flat surface, protecting the surrounding area with drop cloths or newspaper. Remember to apply thin, even coats of paint, allowing each coat to dry before applying the next. Once you are satisfied with the coverage, reattach the fixtures and enjoy your refreshed lighting.
Painting vs. replacing light fixtures: the pros and cons.
If youre considering updating your homes lighting, you may be faced with the decision of whether to paint your existing light fixtures or replace them entirely. Both options come with their own set of pros and cons, so its important to weigh them carefully before making a decision. Painting your light fixtures can be a cost-effective way to update their appearance and give them a fresh, new look. However, it may not be the best choice if your fixtures are outdated or damaged. On the other hand, replacing your light fixtures allows you to choose from a wider range of styles and designs, giving you more flexibility in creating the desired ambiance in your space. However, it can be more expensive and time-consuming than simply painting them. Ultimately, the decision between painting and replacing light fixtures depends on your personal preference, budget, and the condition of your current fixtures. So take some time to assess your needs and weigh the pros and cons before making a final decision.
Before and after photos of spray painted light fixtures.
The first step in any DIY spray painting project is to thoroughly clean the surface of the light fixtures. This will ensure that the paint adheres properly and gives you a smooth, even finish. You can use a mixture of warm water and dish soap to remove any dirt or grime. Next, make sure to cover any areas that you don't want to be painted, such as the sockets or any decorative elements. Use painter's tape or plastic bags to protect these areas. When it comes to choosing the right paint, make sure to select one that is specifically formulated for metal or plastic surfaces. This will ensure that the paint adheres well and is long-lasting. Finally, when you begin spray painting, remember to do so in a well-ventilated area and apply light, even coats. Allow each coat to dry before applying the next one to prevent drips or streaks. With these simple steps, you can easily transform your outdated light fixtures into stylish, modern pieces that will enhance the overall look of your space. For more on enhancing your home, discover what mobile home walls are made of.
Creative ideas for customizing light fixtures with spray paint.
If youre looking to add a personal touch to your space, consider customizing your light fixtures with spray paint. Whether its a ceiling pendant, a table lamp, or a wall sconce, a fresh coat of paint can completely transform its look. First, make sure to choose a color that matches your overall decor and style. Then, ensure that you clean and prepare the fixture properly before painting. Remove any dust or dirt, and use painters tape to protect any parts you dont want to paint. When spraying, remember to do so in a well-ventilated area and follow the instructions on the can. Several light coats are better than one heavy coat, as it prevents drips and allows for a more even finish. Finally, let the paint fully dry before reassembling and installing your newly customized light fixture. In no time, youll have a unique piece that adds a personalized touch to your home. Additionally, discover how you can spray paint faucets for an enhanced look.
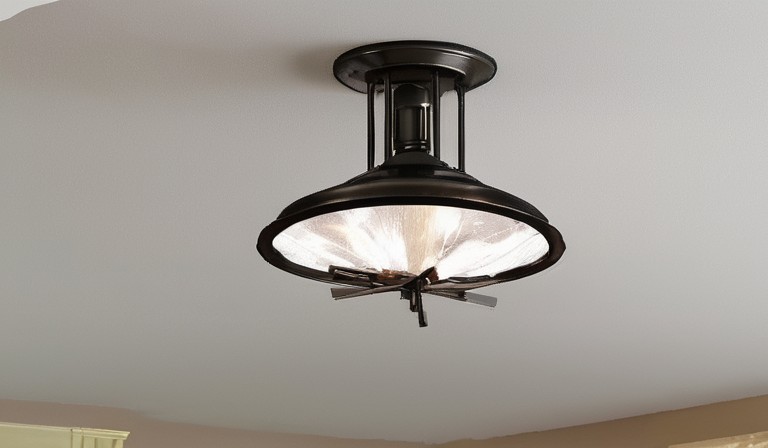
Table of Spray Painting Light Fixtures: A Guide to Transforming and Reviving Your Lighting Décor
| Fixture Type | Number of Light Fixtures | Approved for Spray Painting |
|---|---|---|
| Ceiling-mounted | 10 | Yes |
| Recessed | 4 | No |
| Wall-mounted | 6 | Yes |
| Tabletop | 2 | No |