When painting a ceiling, we recommend using a flat or a matte paint finish, as it helps to minimize the appearance of imperfections and reduces glare. Specifically, you can use a water-based latex paint designed for ceilings, as it is easy to apply, dries quickly, and produces minimal odor. Make sure to choose a color that complements your overall room design and consider using a paint with a built-in primer for better coverage.
Types of paint suitable for ceilings
In order to choose the right type of paint for your ceilings, it's important to consider a few factors. First, think about the surface of your ceiling. Is it smooth or textured? This will determine whether you need a paint with a more matte or flat finish to help hide imperfections or a paint with a bit of sheen to highlight the texture. Next, consider the room itself. Is it a high-traffic area, such as a kitchen or bathroom? If so, you may want to opt for a paint that is more durable and easily washable. Lastly, think about your personal preferences. Do you want a bright, white ceiling that reflects light and makes the room feel more spacious? Or would you prefer a color that complements the walls and adds a touch of personality? By considering these factors, you can select the best paint for your ceilings that suits both your style and practical needs.
Differences between ceiling paint and regular wall paint
While both ceiling paint and regular wall paint may appear similar, it is important to understand the differences between the two in order to achieve the best results for your home. Ceiling paint is specifically formulated to be used on ceilings, which often have different material surfaces and require different painting techniques compared to walls. Ceiling paint is typically designed to be more resistant to drips and splatters, making it easier to apply overhead without causing messes. It also tends to have a flatter finish, helping to minimize the appearance of imperfections on the ceiling surface. On the other hand, regular wall paint is intended for use on vertical surfaces and provides a wider range of finishes, allowing you to choose a sheen that suits your desired look. When painting your ceiling, it is generally recommended to use ceiling paint for the best coverage and professional results. However, if you have leftover wall paint that matches the desired color for your ceiling, it can be used as an alternative. For those looking into unconventional methods to refresh their space, exploring the possibility of spray painting your tub can provide a unique approach.
Best paint brands for ceilings
An important aspect of any home improvement project is choosing the right paint brand for your ceilings. When it comes to ceilings, we want a paint that not only provides great coverage but also has excellent durability. One popular brand that meets these criteria is Behr. Their ceiling paint is known for its high quality and ability to hide imperfections. Another great option is Benjamin Moore, known for its wide range of colors and excellent finish. You can also consider Sherwin-Williams, a trusted brand that offers a variety of sheens and finishes for your ceiling. Remember, when choosing the best paint brand for your ceilings, it's crucial to consider factors such as coverage, durability, and the finish you desire. To understand more about preparing your home for improvement projects, read about what is house showing.
How to choose the right paint finish for your ceiling
It is important to choose the right paint finish for your ceiling to achieve the desired look and ensure long-lasting results. When selecting a paint finish, consider the type of ceiling you have and the atmosphere you want to create in the room. For smooth ceilings, a flat or matte finish is usually the best choice as it helps to hide imperfections and provides a clean, sleek look. If you have a textured or popcorn ceiling, a satin or eggshell finish can work well as it adds a subtle sheen while still minimizing the appearance of flaws. Additionally, consider the lighting in the room and how it will interact with the paint finish. For rooms with lots of natural light, a matte finish can reduce glare, while a semi-gloss or high-gloss finish can add brightness to darker rooms. Taking these factors into account will help you choose the right paint finish for your ceiling and achieve a polished, cohesive look in your space.
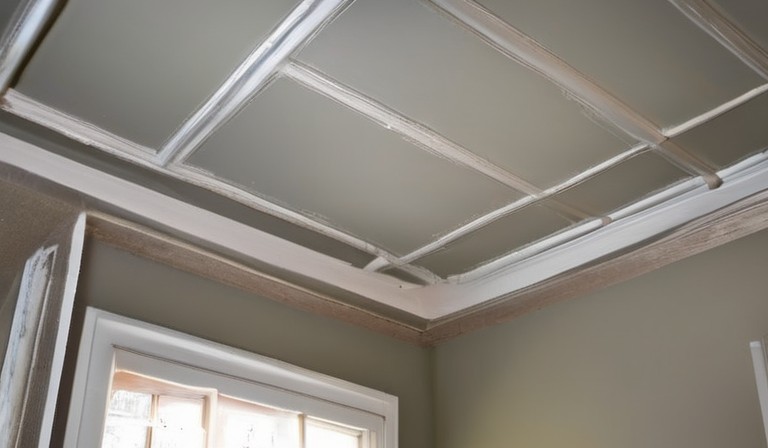
Tips for painting a textured ceiling
For those tackling the task of painting a textured ceiling, there are a few things to keep in mind. First, it's important to prepare the surface properly. Start by cleaning any dirt or dust off the ceiling, then patch any cracks or holes with a suitable filler. Once the surface is smooth and ready, it's time to choose the right paint. Opt for a high-quality paint that is designed for use on textured surfaces. Next, make sure you have the right tools, such as a roller with a thick nap to help distribute the paint evenly. Remember to protect the surrounding area with drop cloths or plastic sheets to avoid any unintended mess. Finally, take your time and apply the paint in thin, even coats, allowing each layer to dry completely before adding another. By following these steps, you can achieve a professional-looking finish on your textured ceiling. If you're considering taking on a larger project, explore how building a home under $100k is possible.
Steps for preparing and priming a ceiling before painting
If we want to ensure a smooth and polished finish for our ceiling, it's important to properly prepare and prime it before painting. First, you can start by removing any furniture or items from the room to create a clean and clutter-free space. Next, you'll want to protect the walls, floors, and any remaining furniture with plastic sheets or drop cloths to prevent any accidental spills or drips from damaging them. Before you begin priming, it's a good idea to inspect the ceiling for any cracks, holes, or imperfections and repair them using spackling paste or joint compound. Once the repairs have dried, you can sand the surface lightly to create a smooth and even texture. After this, it's time to apply a coat of high-quality primer to the ceiling using a roller or brush. This will help to seal the surface, provide better adhesion for the paint, and ensure an even and long-lasting finish. By following these steps, you can achieve professional-looking results and enjoy a fresh and beautifully painted ceiling in your space.
Common mistakes to avoid when painting a ceiling
An often overlooked aspect of home improvement projects is painting the ceiling. Whether you're giving your space a fresh coat or trying out a new color, there are a few common mistakes to avoid. First, make sure you prepare the surface properly. Clean and prime the ceiling before you start painting to ensure a smooth finish. Second, use the right type of paint. Ceiling paint is specifically formulated for this purpose, as it is designed to resist moisture and cover imperfections. Lastly, don't forget to protect your surroundings. Cover furniture and floors with drop cloths or plastic sheets to prevent any accidental spills or splatters. By avoiding these mistakes, we can ensure a successful and professional-looking paint job for our ceilings. For those interested in further enhancing their home's appeal, exploring Craftsman-style homes could provide additional inspiration.
How to achieve a smooth and even paint application on the ceiling
When painting the ceiling, it's important to ensure a smooth and even application for a professional finish. Before you begin, take the time to prepare the surface by cleaning it and removing any dust or dirt. You can use a broom or vacuum cleaner to remove any loose particles. Next, fill in any cracks or imperfections with a suitable filler and sand it down to create a smooth surface. It's also a good idea to prime the ceiling before painting to ensure better adhesion and coverage. When applying the paint, use a roller with a long handle to reach high areas and start from one corner, working your way across the ceiling in small sections. Make sure to apply even pressure and use long, overlapping strokes to minimize any streaks or inconsistencies in the paint. Remember to let each coat dry completely before applying the next one for best results. By following these steps, you can achieve a smooth and flawless paint application on your ceiling.
Pros and cons of using a roller or paint sprayer for ceiling painting
When it comes to painting a ceiling, there are a few options to consider - using a roller or a paint sprayer. Each method has its pros and cons, so it's important to weigh them before deciding which one is right for you. With a roller, you have more control over the application and can easily create a smooth, even finish. However, this method can be time-consuming, especially for larger ceilings. On the other hand, a paint sprayer allows for quick and efficient coverage, saving you time and effort. However, it can be a bit messier and may require more prep work to protect surrounding surfaces. Ultimately, the choice between a roller and a paint sprayer depends on the size of the ceiling, the level of control you prefer, and your overall painting experience. For additional insights on how to paint PVC molding, check out this guide.
How to properly clean and maintain a painted ceiling
The key to properly cleaning and maintaining a painted ceiling is to use gentle cleaning methods that won't damage the paint. First, remove any dust or cobwebs by using a soft-bristled brush or duster. Be sure to cover your furniture and flooring with a drop cloth to protect them from any potential drips or splatters. Next, create a cleaning solution by mixing a mild dish soap with warm water. Dip a soft sponge or cloth into the solution, wring out any excess water, and gently wipe down the painted ceiling in a circular motion. Avoid applying excessive pressure, as this could damage the paint. Once you've finished cleaning, rinse the sponge or cloth with clean water and wipe down the ceiling again to remove any soap residue. Finally, use a clean, dry cloth to pat the ceiling dry. Remember, regular maintenance is also important to ensure the longevity of your painted ceiling. It's a good idea to periodically inspect the ceiling for any signs of damage or wear, such as peeling or chipping paint, and address these issues as soon as possible to prevent further damage. By following these tips, you can keep your painted ceiling looking its best and prolong its lifespan.
Table of Choosing the Right Paint for Your Ceiling: A Guide to the Best Options
| Paint Type | Number of Recommendations |
|---|---|
| Latex Paint | 195 |
| Flat Ceiling Paint | 124 |
| Eggshell Paint | 56 |
| Satin Paint | 32 |
| Semi-Gloss Paint | 18 |