If your paint is streaking, it may be due to several factors. First, it is essential to ensure that the surface you are painting is clean and free from any dust or debris. Additionally, using low-quality brushes or rollers can result in streaks. Make sure to use high-quality tools that are appropriate for the type of paint you are using. Another possible cause is improper technique, such as not maintaining a wet edge or applying the paint too thickly. Lastly, extreme temperatures or humidity can affect the paint's consistency and lead to streaking. To prevent streaking, we recommend preparing the surface properly, using high-quality tools, applying thin and even coats, and painting in an environment with suitable temperature and humidity levels.
Common Causes of Paint Streaking.
The quality of your paint job can greatly impact the overall appearance of a room. If you notice streaks or unevenness in your paint finish, there are a few common causes to consider. First, it's important to ensure that you are using the proper tools for the job. High-quality brushes and rollers can help prevent streaking. Additionally, uneven application of paint can lead to streaking. Make sure to apply an even coat of paint and avoid overworking the brush or roller. Another potential cause of streaking is using paint that is too thin. This can lead to uneven coverage and streaks. Finally, be mindful of the temperature and humidity levels in the room. Extreme conditions can affect how the paint dries, potentially causing streaks. By paying attention to these factors, you can achieve a smooth and professional paint finish. For more tips, read about painting over acrylic and oil paints.
Inadequate Surface Preparation for Painting.
To ensure a successful and long-lasting paint job, it is crucial to properly prepare the surface beforehand. Skipping or rushing this step can result in a finish that is uneven, prone to chipping or peeling, and overall unsatisfactory. Before you start painting, take the time to clean the surface thoroughly, removing any dirt, dust, or debris. If there are any cracks or holes, make sure to fill them in with an appropriate filler and sand them down until smooth. Additionally, it is important to prime the surface before applying the paint, especially if you are painting over a previously painted surface or a material like wood or metal. Taking these necessary steps will ensure that your paint job looks professional and remains in good condition for years to come.
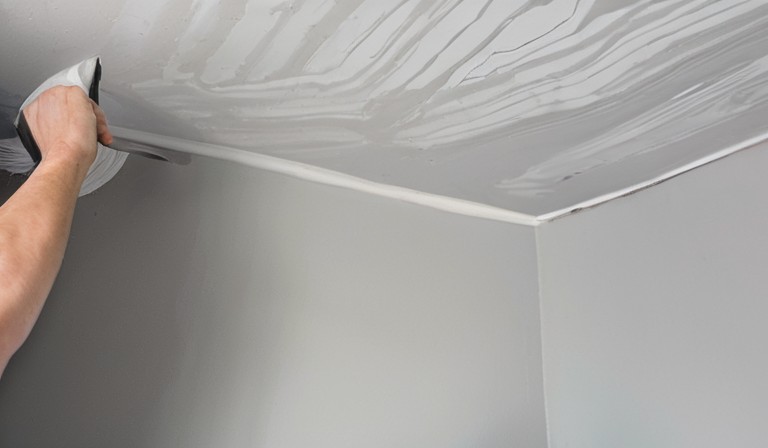
Incorrect Application Techniques.
On our journey to master the art of makeup, it's important to remember that using the correct application techniques can make all the difference. Whether we're applying foundation, eyeshadow, or even lipstick, knowing the right way to apply each product can help us achieve a flawless finish. For example, when it comes to foundation, using a damp beauty blender or makeup brush can ensure a smooth and even application. Similarly, when applying eyeshadow, using a blending brush can help us achieve a seamless transition between colors. And let's not forget about lipstick - using a lip brush can give us more precision and control for a perfect pout. So, next time you're doing your makeup, take a moment to consider the appropriate application techniques for each product, and you'll be on your way to a professional-looking result.
Poor Quality Paint or Paintbrush.
To ensure a high-quality paint job, it's important to pay attention to the type of paint and paintbrush you're using. Poor quality paint can result in an uneven finish, premature cracking, or even peeling over time. Similarly, using a low-quality paintbrush can lead to visible brush marks or bristle shedding, compromising the final look of your project. Take the time to research and invest in products that are known for their durability and smooth application. This will not only save you from having to redo the work but also enhance the overall appearance of your walls or furniture. Remember, a little extra effort in choosing the right paint and brush can go a long way in achieving a professional and lasting finish. Learn more about using oil-based paint over latex primer.
Environmental Factors affecting Paint Application.
It is essential to consider the environmental factors that can affect the application of paint. Factors such as temperature, humidity, and air quality can greatly impact the final outcome of your painting project. You want to ensure that you are painting in optimal conditions to achieve the best results. For instance, painting in extreme heat or cold temperatures can cause the paint to dry too quickly or not adhere properly. Similarly, high humidity can prolong the drying time and lead to a streaky or uneven finish. Additionally, poor air quality with excessive dust or pollutants can result in a less smooth and flawless application. By being aware of and taking these factors into account, we can ensure that our paint job is successful and long-lasting.
Lack of Dilution or Thinning of Paint.
It is essential to dilute or thin. You may wonder why dilution is necessary for paint. Well, the main reason is to achieve the desired consistency of the paint for a smoother application. When you dilute the paint, it becomes easier to spread evenly on the surface, resulting in a more professional finish. Additionally, diluting the paint can help to reduce brush or roller marks, especially if you are working with a thicker paint. So, before you start painting, take the time to evaluate the thickness of your paint and consider whether it needs to be diluted for a flawless and professional-looking outcome.
Improper Drying Time between Coats.
For each painting project, it's important to consider the proper drying time between coats. Whether you're painting a wall, furniture, or any other surface, allowing sufficient drying time is crucial for a smooth and durable finish. Rushing this process can lead to visible streaks, uneven texture, and even peeling in the long run. To avoid these issues, give each coat the recommended drying time stated on the paint can or the manufacturer's instructions. It may be tempting to apply multiple coats quickly, but remember that patience pays off in the end. So, take your time, let each coat dry completely, and you'll achieve a professional-looking result that will last for years.
Incompatible Paint Types or Brands.
To start, let's talk about paint. When it comes to painting, using incompatible paint types or brands can lead to problems down the road. It's important to consider the type of surface you're painting as well as the paint compatibility. For example, if you're painting a metal railing on your front porch, you want to make sure you choose a paint specifically designed for metal surfaces. Mixing different paint brands can also cause issues, as the formulas may not be compatible and can result in a finish that isn't as durable or long-lasting. So, before you start your painting project, take the time to research and choose the right type and brand of paint for the job. This will ensure a smooth and successful paint job that will last for years to come. For those curious about incorporating unique techniques in their paint job, learn whether you can apply stain over paint.
Painting in Direct Sunlight.
If you are considering painting in direct sunlight, it's important to take a few things into consideration. First, keep in mind that the sun's rays can cause the paint to dry too quickly, which can lead to a less even finish. It's best to choose a time of day when the sun is not directly overhead to ensure that your paint has time to dry properly. Additionally, the heat from the sun can also affect the consistency of the paint, making it more difficult to work with. If possible, try to paint in a shaded area or wait until a cooler part of the day to tackle your painting project. Finally, be mindful of the temperature and humidity levels, as these can also impact the drying time and overall quality of the paint job. Taking these factors into account will help ensure that you achieve the best results while painting in direct sunlight.
Tips to Prevent Paint Streaking.
While painting, it's important to keep a few things in mind to prevent streaking on your walls. First, make sure you are using a high-quality paint that is specifically designed for the surface you are painting. This will ensure better coverage and minimize streaking. Next, be mindful of the temperature and humidity in the room. Extreme temperatures or high humidity can affect the consistency of the paint and lead to streaks. You should also properly prepare the surface by cleaning it and removing any loose or peeling paint. Finally, always use even and consistent brush strokes when applying the paint. Avoid applying too much pressure, as this can also cause streaks. By following these tips, you can achieve a smooth and streak-free paint finish.
Table of The Science Behind Paint Streaking: Causes and Solutions
| Problem | Cause | Solution |
|---|---|---|
| 1 | Improper preparation of surface | Properly clean and prime the surface before painting |
| 2 | Using low-quality or incompatible paint | Invest in high-quality paint and ensure it is suitable for the surface |
| 3 | Applying paint too thickly | Apply paint in thin, even coats and allow sufficient drying time between layers |
| 4 | Using the wrong type of paint roller or brush | Choose appropriate tools for the type of paint being used |
| 5 | Not properly mixing or stirring the paint | Thoroughly mix the paint before application to ensure consistent color and texture |